Irresistible Huckleberry Cheesecake Recipe
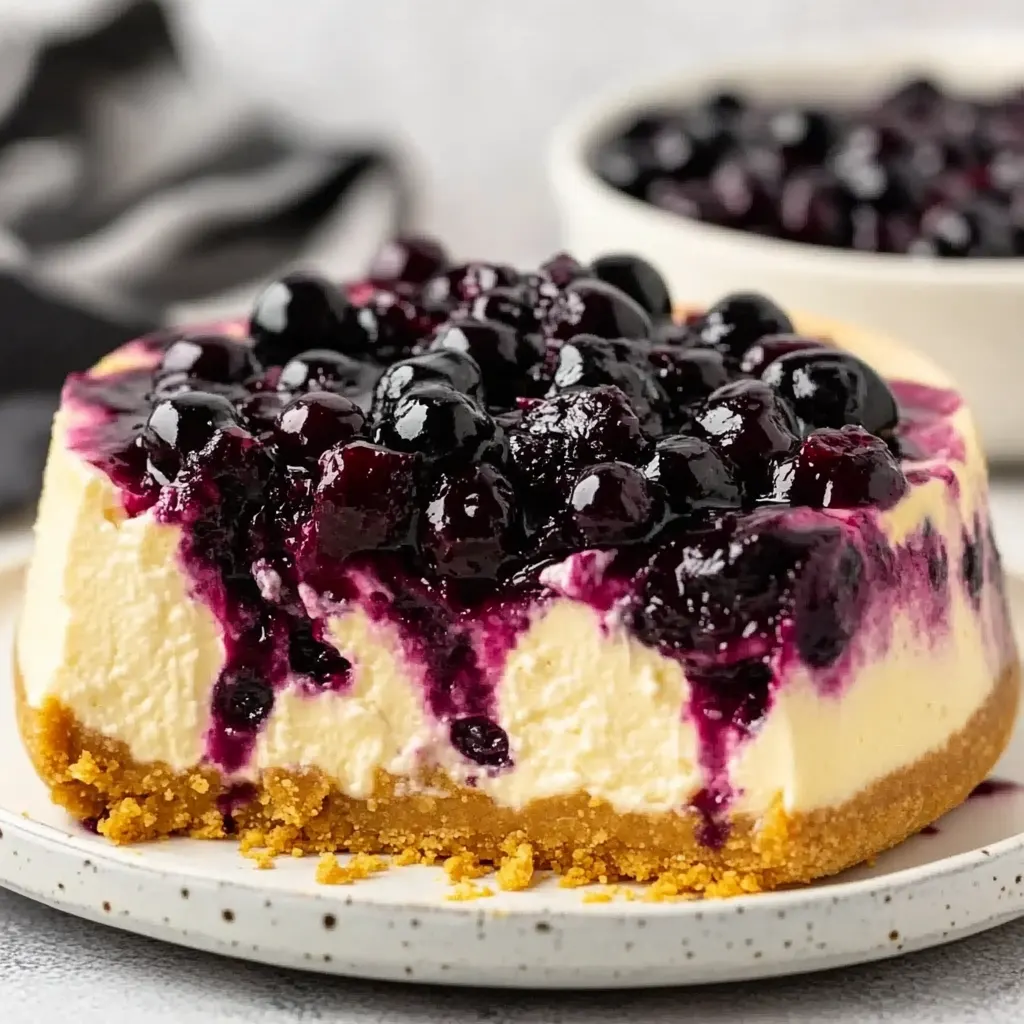
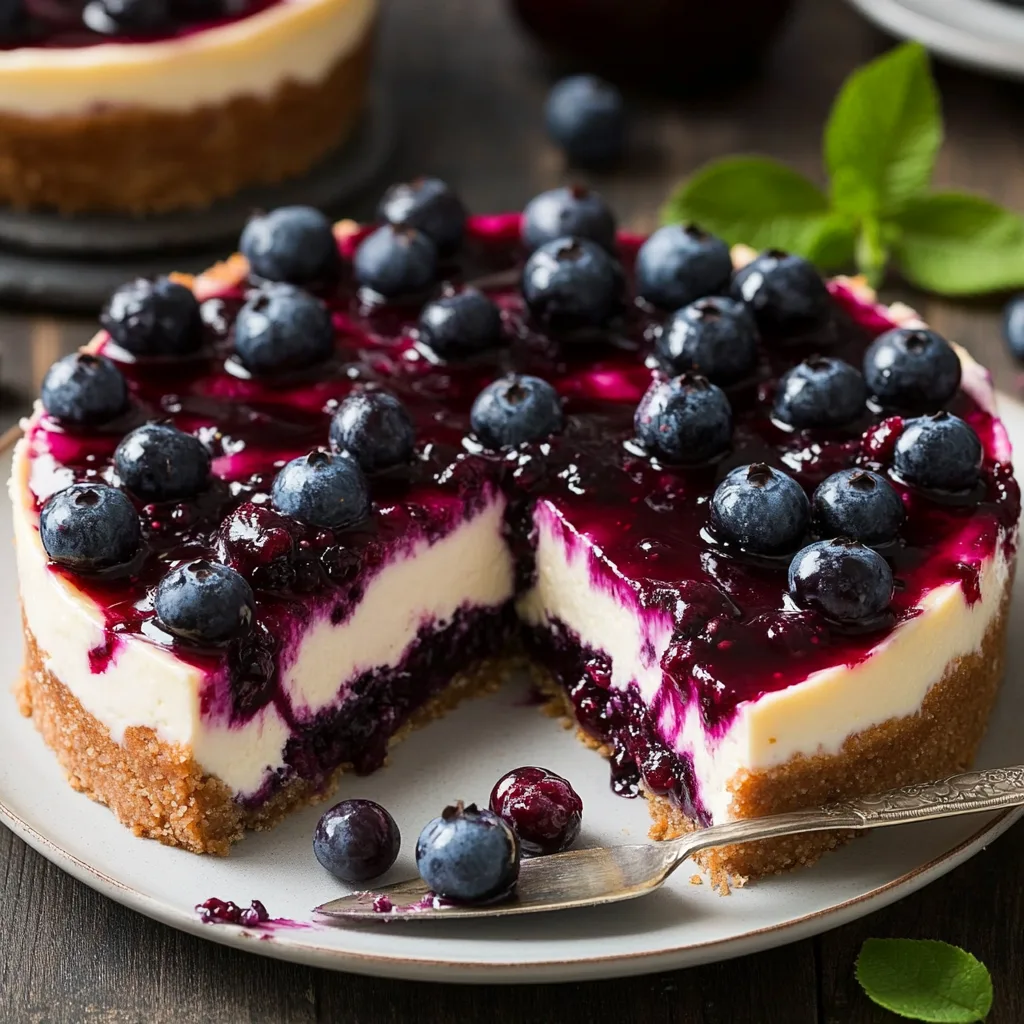
If you’re craving a dessert that’s as stunning as it is delicious, this huckleberry cheesecake recipe is about to become your new favorite. Whether you’re hosting a dinner party, celebrating a special occasion, or simply indulging your sweet tooth, this dessert checks all the boxes. From its buttery graham cracker crust to the creamy cheesecake filling topped with a luscious huckleberry layer, every bite feels like a celebration.
In this article, we’ll take you through the entire process, from gathering ingredients to perfecting the final presentation. Along the way, we’ll share tips, tricks, and answers to common questions to ensure your cheesecake turns out flawless.
Table of Contents
Introduction to Huckleberry Cheesecake
What Makes Huckleberries Special?
Huckleberries are tiny, vibrant berries packed with a tangy, sweet flavor that’s often compared to blueberries but with a bolder, more complex taste. These berries are a treat because they’re wild and not widely cultivated, making them a coveted ingredient in desserts. Their bright flavor complements the rich creaminess of cheesecake perfectly, creating a dessert that’s equal parts refreshing and indulgent.
Not to mention, huckleberries are loaded with antioxidants, making them not only delicious but also nutritious. If you’ve never worked with these berries before, this cheesecake is a fantastic way to get acquainted with their unique charm.
Why Try This huckleberry cheesecake Recipe?
This huckleberry cheesecake recipe is a real crowd-pleaser. It’s easy enough for beginner bakers but impressive enough to wow your guests. With a buttery crust, velvety filling, and a fruity topping that bursts with flavor, it’s a dessert you’ll want to make again and again.
Whether you’re using fresh huckleberries from a local farmer’s market or frozen ones from the store, this recipe is versatile and forgiving. Plus, it can be prepared ahead of time, making it ideal for busy schedules. It’s the perfect blend of convenience and decadence.

Ingredients for huckleberry cheesecake
Crust Essentials
Every great cheesecake begins with a solid crust, and this huckleberry cheesecake recipe is no exception. For the base, you’ll need crushed graham crackers and melted butter. These two simple ingredients come together to create a sturdy yet buttery foundation that complements the creamy filling and fruity topping.
For the best results, crush the graham crackers finely. You can use a food processor or place them in a zip-top bag and crush them with a rolling pin. Once they’re evenly crushed, mix them with melted butter until the crumbs feel slightly moist. This ensures they stick together and hold their shape when pressed into the pan.
Creamy Cheesecake Filling
The filling is where the magic happens. For this recipe, you’ll need cream cheese, sugar, and whipped topping (like Cool Whip). The cream cheese provides that signature richness, while the sugar sweetens the mix. The whipped topping makes the filling light and airy, creating a melt-in-your-mouth experience.
If you’re looking to tweak the recipe, you can use mascarpone cheese for a slightly different flavor or swap regular sugar for powdered sugar to achieve a smoother texture.
The Star of the Show – huckleberry cheesecake
The topping is what makes this dessert truly shine. You’ll need huckleberries, sugar, lemon juice, and cornstarch to create a glossy, sweet, and slightly tart topping. Whether you use fresh or frozen huckleberries, their bold flavor steals the spotlight.
If huckleberries aren’t in season, frozen ones work just as well. Thaw them completely and pat them dry to prevent excess moisture. Adding a pinch of lemon juice enhances the berries’ natural flavor, giving the topping a bright, vibrant taste.
Step-by-Step Recipe Instructions huckleberry cheesecake
Preparing the Crust
Start by preheating your oven to 350°F (175°C). Combine the crushed graham crackers with melted butter in a mixing bowl. Stir until the mixture is evenly moistened, then press it firmly into the bottom of a 9×13-inch baking dish. Use the back of a spoon or your hands to press the crust into an even layer.
Pop the crust into the oven and bake for about 8–10 minutes until it’s lightly golden and fragrant. Let it cool completely before adding the filling to prevent a soggy base.
Crafting the Cream Cheese Filling
In a large bowl, beat the softened cream cheese with sugar until smooth and creamy. This step ensures there are no lumps in your filling. Gently fold in the whipped topping, being careful not to deflate it.
Once the filling is ready, spread it evenly over the cooled crust using a spatula. Smooth the surface as much as possible for a clean, professional look.
Making the Huckleberry Topping
To make the topping, combine sugar, water, cornstarch, and a pinch of salt in a saucepan. Cook over medium heat, stirring constantly until the mixture thickens and turns clear. This step usually takes about 3–5 minutes.
Add the mashed huckleberries and lemon juice to the mixture, stirring well. Simmer for another 5 minutes until the topping is thick and glossy. If you’d like a pop of color, add a drop of red food coloring, though this is completely optional.
Layering and Baking
Once your crust and filling are set, pour the huckleberry topping over the cheesecake layer. Use a spoon to spread it evenly, then scatter whole huckleberries on top for a burst of texture and flavor.
Bake the assembled cheesecake in the oven for 10 minutes. This step helps meld the flavors and set the layers. Let the cheesecake cool completely before slicing it into squares or serving.
With these detailed instructions, you’re well on your way to creating a huckleberry cheesecake recipe that’s as impressive as it is delicious. Next, we’ll share tips and tricks to make your cheesecake even better!
Tips and Tricks for huckleberry cheesecake
Troubleshooting Common Issues
Making cheesecake isn’t always smooth sailing, but these tips will help you tackle any hiccups. If your cheesecake cracks, don’t fret—it’s still delicious! To prevent this next time, avoid overmixing the filling, which introduces too much air. Also, ensure your ingredients, especially the cream cheese, are at room temperature before starting.
Soggy crusts are another common issue. To avoid this, let the crust cool completely before adding the filling. If you’re using frozen huckleberries, pat them dry to reduce excess moisture.
Fresh vs. Frozen huckleberry cheesecake
You can make this huckleberry cheesecake recipe with either fresh or frozen huckleberries, depending on availability. Fresh berries are perfect when in season, offering a firm texture and vibrant flavor. However, frozen berries are a fantastic year-round alternative. Just make sure to thaw and drain them properly.
Presentation and Serving huckleberry cheesecake
To wow your guests, garnish the cheesecake with a sprinkle of fresh huckleberries and a dusting of powdered sugar. A dollop of whipped cream on each slice adds an extra touch of decadence. For a festive flair, consider serving with a sprig of mint or edible flowers.
If you’re looking for more cheesecake inspiration, check out our What Does Adding an Extra Egg to Cheesecake Do?, which offers a creative twist on classic cheesecake flavors.
Nutrition and Storage Information
Calorie and Macronutrient Breakdown
If you’re keeping an eye on your diet, it’s helpful to know what’s in each slice. This huckleberry cheesecake recipe has approximately 574 calories per serving, with 31 grams of fat, 70 grams of carbs, and 6 grams of protein. It’s indulgent, sure, but it’s worth every bite!
Storing and Reheating
Cheesecake is best stored in the fridge, where it will stay fresh for up to 5 days. Make sure to cover it tightly with plastic wrap or place it in an airtight container to prevent it from absorbing other odors.
If you have leftovers you’d like to keep longer, freeze individual slices. Wrap each slice in plastic wrap and then aluminum foil to protect against freezer burn. When you’re ready to enjoy, thaw the slices in the fridge overnight.
For reheating, microwaving isn’t recommended as it can alter the texture. Instead, allow the cheesecake to come to room temperature naturally for the best flavor and consistency.
FAQs About Huckleberry Cheesecake
Can I Use Blueberries Instead of Huckleberries?
Absolutely! If huckleberries are hard to find, blueberries make an excellent substitute for this huckleberry cheesecake recipe. They share a similar sweetness and tanginess, though huckleberries have a more intense flavor. If you’re using blueberries, the process remains the same. Just make sure to adjust the sugar slightly to balance the sweetness.
How Can I Make This Cheesecake Gluten-Free?
Good news—this recipe is easily adaptable for gluten-free diets! Swap the graham crackers in the crust for gluten-free graham crackers or crushed almond flour cookies. Ensure all other ingredients, especially the whipped topping, are labeled gluten-free to avoid cross-contamination. With these simple changes, you can enjoy a gluten-free huckleberry cheesecake recipe that tastes just as delightful.
How Long Does Huckleberry Cheesecake Last?
When stored properly, cheesecake can last up to 5 days in the fridge. For longer storage, freezing is the way to go. Individual slices can stay fresh in the freezer for up to 3 months. Remember to thaw them slowly in the refrigerator before serving for the best results.
What Are Some Creative Variations of This Recipe?
There are so many ways to customize this huckleberry cheesecake recipe! For a chocolate twist, add a layer of melted chocolate on top of the crust before spreading the filling. Or, mix a handful of crushed nuts, like almonds or pecans, into the crust for extra crunch. If you want to try a citrusy version, add a tablespoon of orange or lemon zest to the filling for a bright, zippy flavor.
Related Recipes and Pairing Ideas
More Cheesecake Recipes to Try
If you love this huckleberry cheesecake recipe, why not explore other cheesecake flavors? A classic New York cheesecake is always a hit, or you could try a fruity option like raspberry swirl cheesecake. For something completely different, a rich chocolate cheesecake might become your next favorite.
Perfect Beverage Pairings
Pairing the right drink with your cheesecake can elevate the experience. For this recipe, a cup of freshly brewed coffee or a glass of lightly sweetened iced tea complements the tangy-sweet huckleberry topping beautifully. For adult gatherings, consider serving a chilled dessert wine, like Moscato, or even a sparkling rosé.
If you’re hungry for more dessert inspiration, check out Alexia Recipes for other berry-filled delights and cheesecakes to try at home!
Conclusion: Impress Your Guests with Huckleberry Cheesecake
The Perfect Dessert for Any Occasion
This huckleberry cheesecake recipe is more than just a dessert—it’s a show-stopping centerpiece for any table. Its buttery crust, creamy filling, and tangy huckleberry topping come together to create a symphony of flavors in every bite. Whether you’re baking for a celebration, a family dinner, or simply treating yourself, this cheesecake is sure to delight.
So, gather your ingredients, follow the steps, and enjoy the process. Once you serve this irresistible dessert, don’t be surprised if your guests ask for the recipe. It’s time to turn simple ingredients into a masterpiece!

2 thoughts on “Irresistible Huckleberry Cheesecake Recipe”
Comments are closed.